
Too Many Requests from Your Network
Please complete verification to access this content.
A lot of Ninja Outreach subscribers ask: how can you use Ninja Outreach for content marketing?
One of our favorite answers to that? Guest posting.
You see, guest posting is one of the fastest, most low-cost methods of content marketing.
Neil Patel has called it the best inbound marketing strategy.
Brian Harris from VideoFruit received over 1.7k visits and over 200 subscribers (a 12% overall conversion rate) from a single guest post on OKdork.
And even in the case of our CEO, Dave Schneider, a single guest post he published on a high-ranking website brought Ninja Outreach more than two dozen app signups, hundreds of visitors, and a conversion rate twice as high as our norm.
Below is a screenshot of all referral traffic our guest posts have sent us so far.
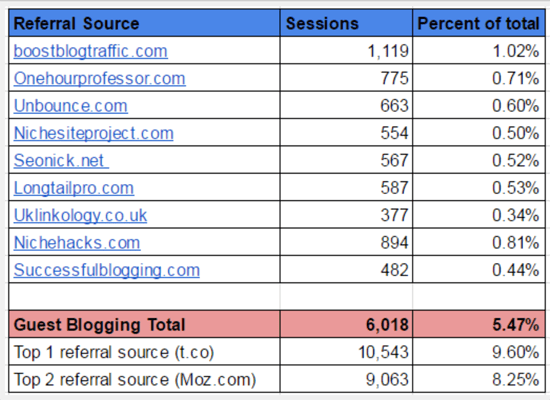
As you can see, with over 6k visits, guest blogging is our third highest source of referral traffic to date.
And all that came from only around 10 guest posts.
Imagine if you could scale that up even further?
That’s where Ninja Outreach shines.
It helps you scale up your guest posting campaigns by streamlining the process of researching for prospects, managing prospect lists, and tracking all your email outreach.
Now let’s show you how that’s done in the tool with an in-depth walkthrough.
Prospecting for Guest Post Opportunity
The NinjaOutreach Promotions tab is the best place to start looking for prospects to promote your business to.
Say you’re selling an anti-aging eye cream product and are looking to get more traffic to your site via guest posts.
Go to Prospecting > Promotions and use the keyword, “skin care blogs.”
Why?
Skin care blogs with an audience of skin care aficionados are the best type of traffic to attract since they would also be the most likely to be interested in an anti-aging eye cream product.

Another tip:
To find more prospects, use broader, niche-based keywords such as “beauty blogs” or “skin care bloggers” instead of something so specific like “anti-aging cream.”
Using tags and filters to narrow your search
When prospecting, you need to filter out certain items so you can refine your search results.
Enter Ninja Outreach and tags and advanced filters.
Underneath the search menu are several filters to help produce more relevant results.

If you click “Blogger,” for example, Ninja Outreach will include results that specifically have the word “blogger,” “blog,” or “blogging” on the site’s bio page.
Since you’re targeting beauty bloggers, click “Include.”
On the other hand, if you click “Exclude” Company, Ninja Outreach will not include any pages that have “company,” “companies,” or “agency” on their bio page.

There are also Advanced Filters to narrow results by location, page and domain type, SEO, and social media metrics.
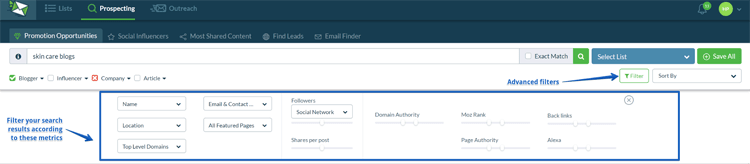
For your guest posting campaign, you’ll want to connect with bloggers who’ve been in the space for some time and have decent social media engagement.
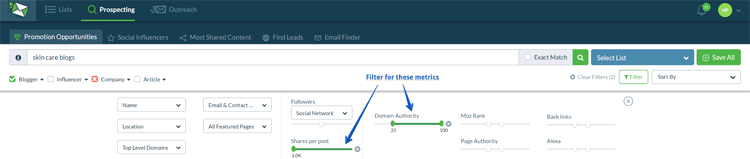
So, set the domain authority (DA) to a minimum of 25, and social media shares per post to a minimum of 1k.
Note – all filters should be considered in the context of how many results you’re getting i.e if you aren’t getting a lot of results for a particular keyword you might want to loosen up the filters.
To make sure you can reach out to your prospects faster, narrow your results to display only the prospects with available contact info.

And, in case you’re wondering—yes, you can use advanced search operators in NinjaOutreach.
For example, you can try these to look for guest post opportunities:
- [Your-Topic] inurl:/guest-post/
- [Your-Topic] inurl:category/guest-post/
- [Your-Topic] intitle:guest post
Then, replace the keywords in bold above with these variations below:
- guest post
- guest-post
- guest posts
- guest-posts
- write-for-us
- write for us
- guest post guidelines
- guest-post-guidelines
- guest contributor
- guest-contributor
Social Influencers
Our Social Influencers prospecting engine crawls Twitter and Instagram data. So, it’s best used for finding social media influencer profiles on social media.
Just go to Prospecting > Social Influencers, type your keyword, use the necessary tags and filters, then hit Search.
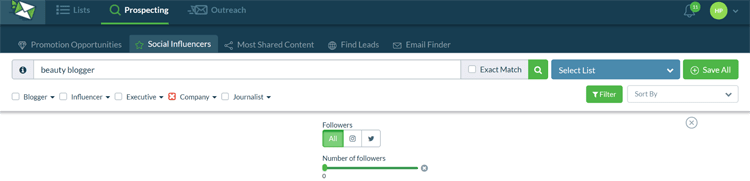
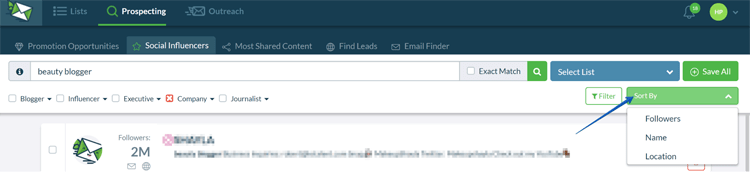
Note that you can also sort results according to name, location, and number of followers.
You can play around with your keywords and filters until you’ve identified the influencer bloggers you want to reach out to.
Adding Prospects
Once you’re done searching, you need to save your prospects into an outreach list.
To do that, just click the plus sign close to your target prospect’s card.

To instantly save all results into your list, click Save All. And if you want to bulk save multiple (but not all) prospects, tick the checkbox in the far left corner of each prospect card.
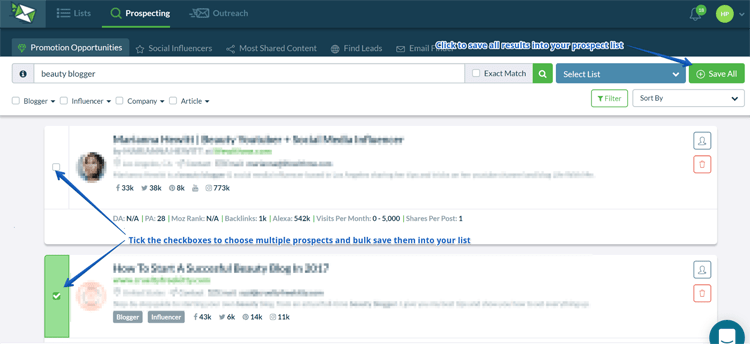
You’ll then be prompted to save your chosen prospect/s into a list.
If you’re creating the list for the first time, just create a new list name and hit Save.
If you’re adding prospects to an existing list, just choose which one from the dropdown menu and hit Save.
If you’re going to create a new list, just enter the name for your new list in the input field beside the dropdown.
Below, I chose my test list of beauty bloggers “Anti Aging Cream Prospects.”
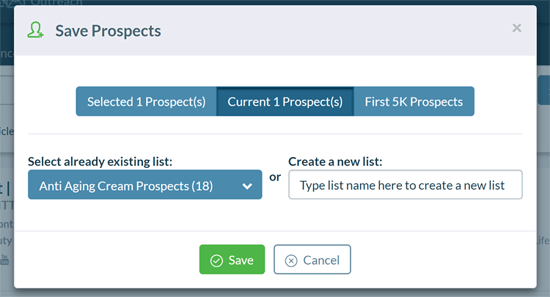
Just hit Save, and you’re done adding prospects to your list.
Crafting Your Guest Post Pitch
Ninja Outreach has a ready-made template for most scenarios, guest posting included.
For starters go to Outreach > Templates to see our preliminary list of template examples.
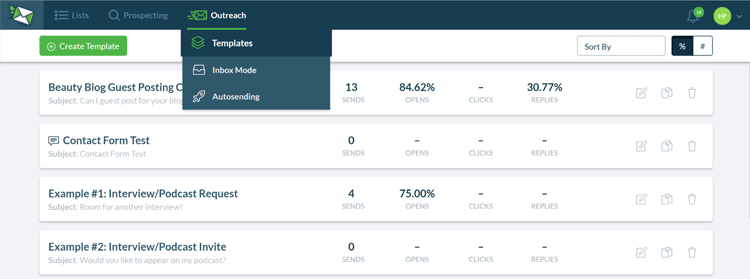
Here’s one example of our basic Interview/Podcast Request templates.
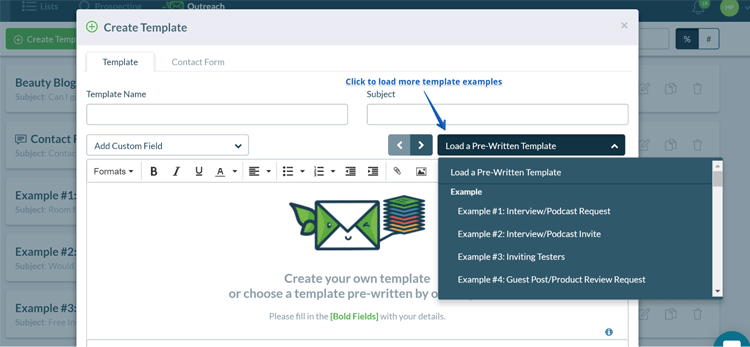
For even more pre-written templates, go to Create Template.

Once you see the popup, click Load a Pre-Written Template and choose which template fits your purpose from the dropdown.
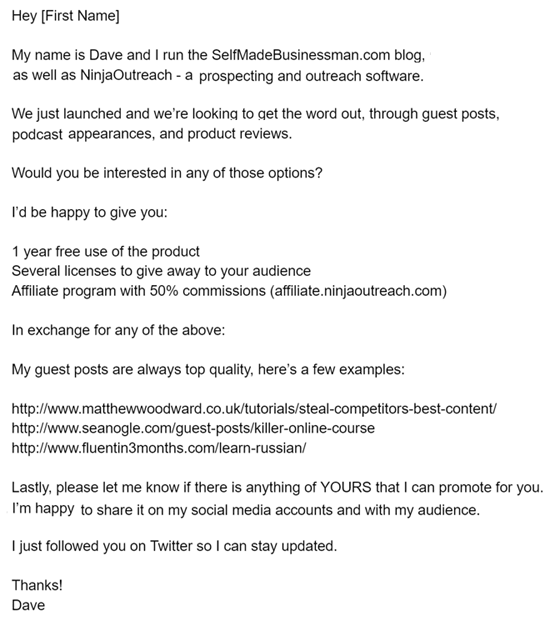
Of course, you can also choose to forego the pre-written templates and just type up your own from scratch.
After that, just fill up the rest of the required information.
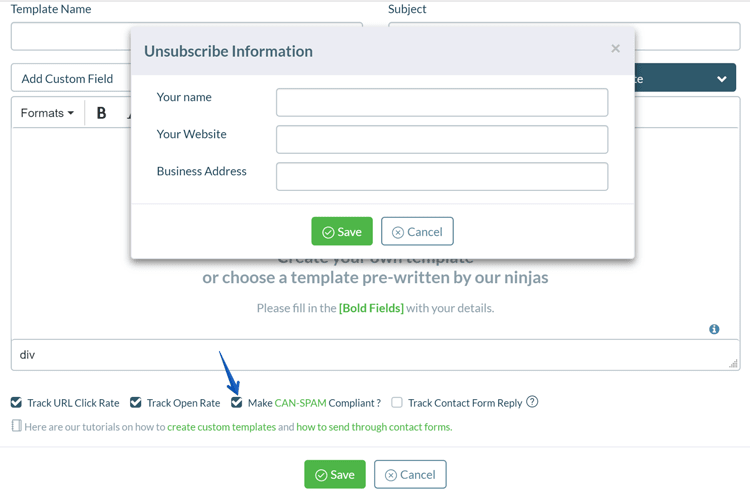
Finally, at the bottom of the Create New Template popup, you can choose to track certain analytics of your email, such as open and click rate.
![]()
If you click Make CAN-SPAM Compliant, you’ll get a pop-up that will require you to input unsubscribe information.
When you’re done preparing your template, just click Save!
To start setting up your campaigns, integrate your email with NinjaOutreach, then read the rest of these quick tutorials on:
- How to install and use the NinjaOutreach Chrome extension
- How to send automated emails and followups
- How to manage your campaigns
Viewing Your Campaign Summary
So, you’ve launched your first guest posting campaign.
What next?
You’d probably want to monitor this campaign, of course.
To view a summary of data about your ongoing campaign, click Outreach Mode.
Active Campaigns displays all your currently active campaigns. This gives you an overview of where you’re at with each campaign, such as:
- How many emails you’ve sent per day
- How many prospects you’ve reached in your overall list so far
- How you’re progressing; if you’re in the main, first follow-up, or second follow-up stage
- Etc
The pause button lets you pause any active campaign, while the play button enables you to resume.
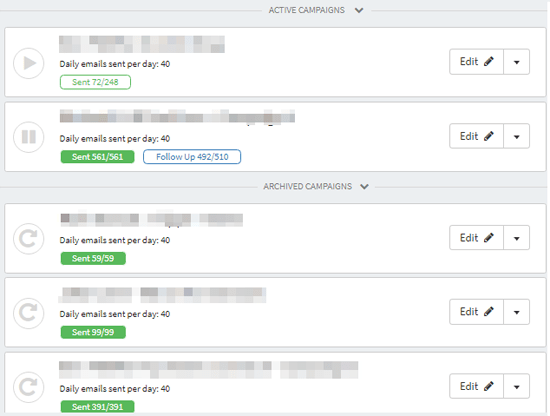
Once your campaign is done, it will go under the Archived Campaigns section.
Viewing Campaign Results
Finally, your guest posting campaign is done, and you want to see the results.
Maybe you’re interested in seeing your success rate; perhaps you want to make a case study about it.
Whatever the case, you can go to Outreach > Inbox Mode, then choose the prospect list you want to review.
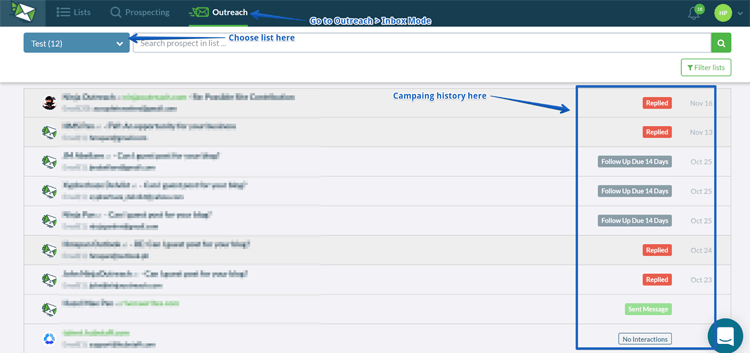
Alternatively, you can go to the upper left corner of the app and click Notifications.
Here, you’ll see drop-down alerts of all the activities in your campaign.
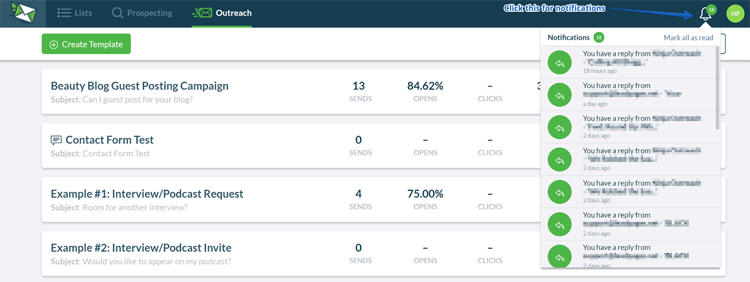
You’ll get notifications on things such as:
- Emails sent
- Replies found
- Followups
- Dues
- Etc
Managing Blogger Relationship Labels
When managing your prospects, you need to have some way to quickly identify them with once they reply and start a conversation with you.
That’s where NinjaOutreach’s Relationship labels come in.
You can choose from preset Relationship labels, such as if a prospect has agreed to your guest post request or has left a comment on your blog.
Alternatively, you can manually add your own relationship label if you can’t find what you need in the presets.
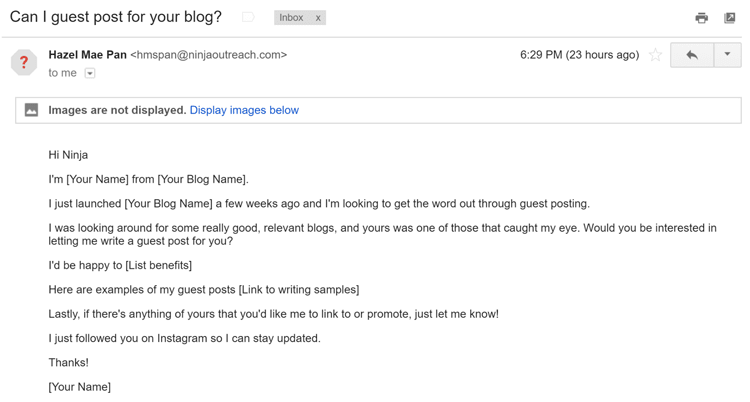
For example, once you go through notifications of your campaign results, you may see one of the beauty bloggers you contacted has replied with a message like this:
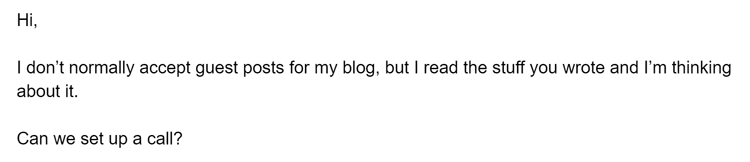
You can now add a custom label like: “Blogger agreed to set up a call for further discussion.”
As your conversation progresses, you can update these labels to reflect the development in your relationship.
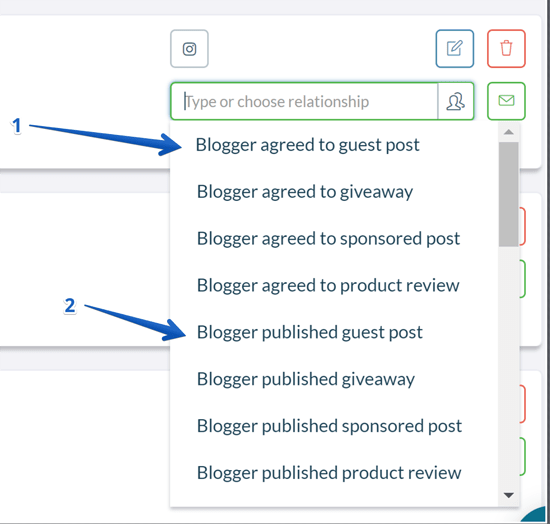
For example, once beauty blogger finally agrees to let you guest post…
You can now update your relationship label with the Ninja Outreach preset, “Blogger agreed to publish guest post.”
Then, once published, update your relationship label with “Blogger published guest post.”
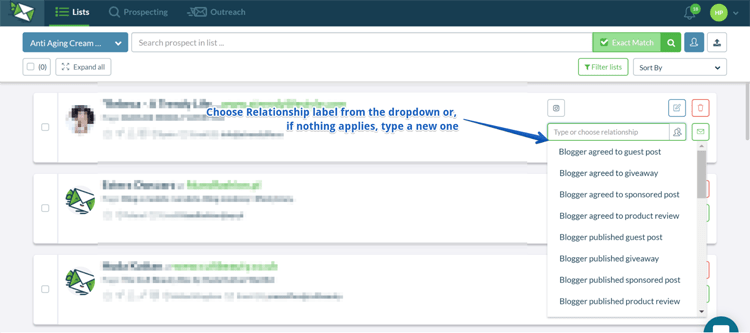
To bulk edit the data on your prospects, go to Lists > Lists of Prospects and choose your target list.
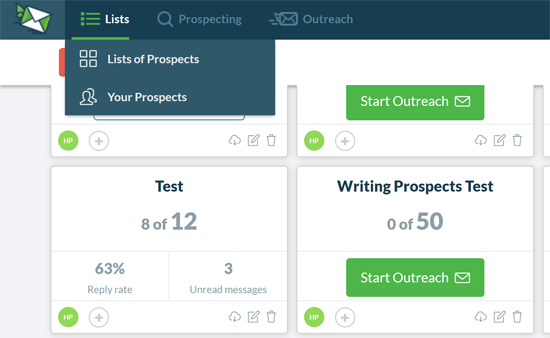
This will load all your prospects in that list. Just choose which ones you’d like to build edit, then check the boxes at the far left side of each prospect card.
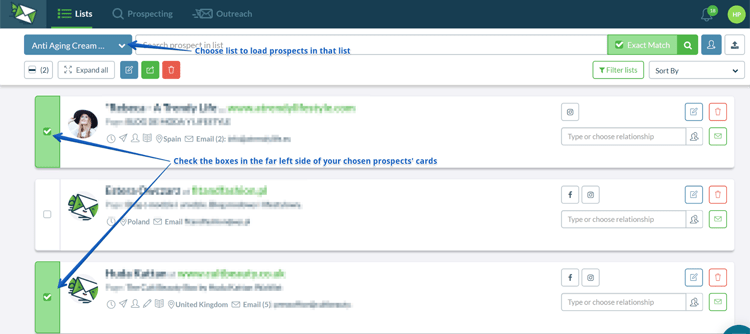
For example, if you want to change the relationship label of several prospects from nothing to
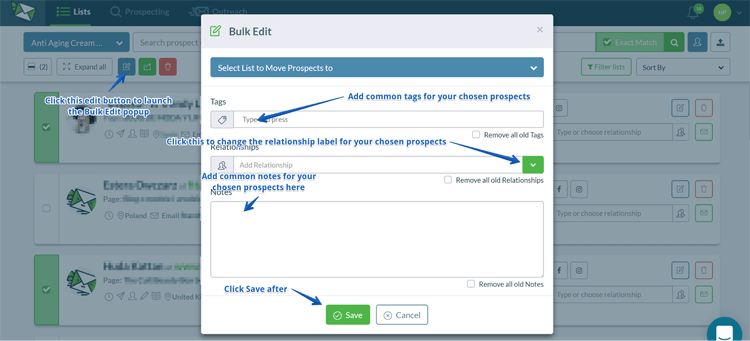
“Contact with Blogger – Emailed,” just click the side boxes on each of the prospects’ cards, click the edit button.
You’ll see a popup and from this, you’ll see the things you can edit in bulk.
Choose relationships and the right label from the dropdown.
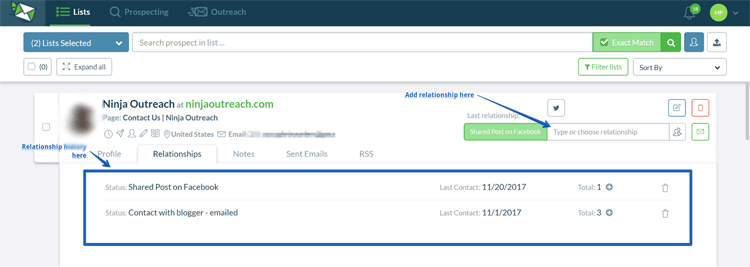
Tutorial on managing your prospect relationships and history.
The relationship labeling feature is handy because it lets you view a summary of all your prospect interactions as you go along.
From there you can see the dates, frequency, and nature of the interactions you’ve had.
Knowing all this makes for better analytics, more personalized conversations and, frankly, helps avoid embarrassing miscommunication.
Imagine if you mistakenly send the same outreach email to the same blogger who already published your guest post.
You could get lucky and they may be cool about it, but some might take offense.
You may even get a reply like this:

Embarrassing fail, right?
An interaction like that could probably cost you some goodwill points with your prospect.
But with Ninja Outreach relationship labeling, you can keep things like this on track.
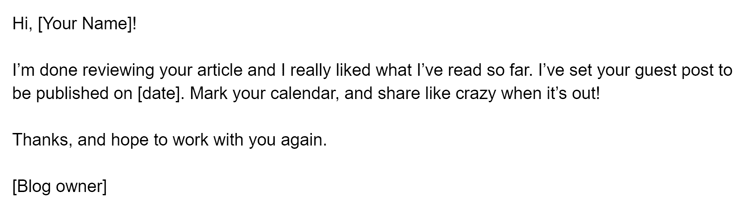
So the next time you reach out to this prospect, you can refer to your history, such as the guest post of yours that they published.
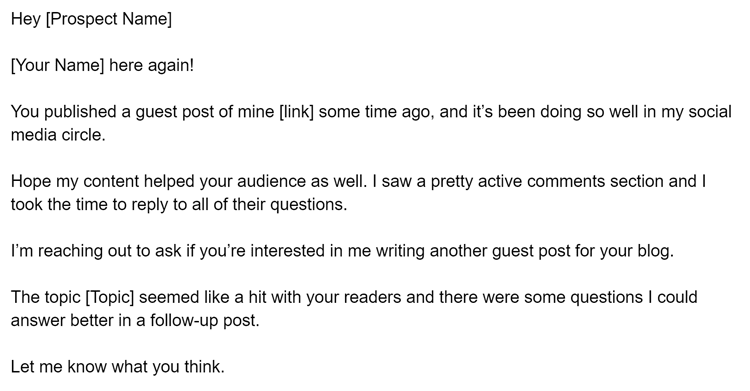
As you can see, this time, you’re not reaching out to your prospect as a complete stranger (or dunce).
You’re someone that they’ve already had a productive collaboration with before!
As they say in the marketing world, warm leads always convert better.
Finally, there are several terms you will encounter as you use the tool.
Below are their definitions, which you should remember when analyzing Ninja Outreach metrics:
- Replies – prospects who replied to your email
- Follow-up due – prospects who have not replied after 3,7,14 days of receiving your first outreach email
- Clicked a link – prospects who clicked any link in your email
- Never Opened – prospects who haven’t opened your email
- Never Replied – prospects who haven’t replied to any of your emails
- Not Contacted – prospects you haven’t contacted yet
- Opened an email – prospects who opened an email
- Sent Messages – prospects who were sent an email
Any questions?
So, there you have it! Hope this helped you understand how you can use our tool for your next guest posting campaign.
If there’s anything else you still need help with, feel free to reach out to us.
Our Customer Support Ninjas are always ready to assist you!